Convert Lamp to LED
This can be a quickie task showing how you can upgrade a classic bike lamp for a '60s or '70s roadster into a strong 1W Light-emitting Diode light. Its a great deal more efficient and a lot brighter!
It is a rather old project, utilizing the very first version hands down the MintyBoost - It wont-work with V3 Mintyboosts at this time offered!
Check your regional bicycle shop or e-bay for tossed completely lights. They are plentiful!
This was $5, that will be a reasonable cost.
White LEDs want to operate at 3.3-3.5V, you can use 3 AA battery packs but the current can fluctuate a whole lot and finding the lowest dropout regulator might be a pain. Rather We thought we would use a MintyBoost that I hacked to make certain that as opposed to 5V out it provides 3.3V. Its perhaps not perfect whatsoever, because it doesn't drive the Light-emitting Diode at full-power, but that is OK by myself.
First build a mintyboost but leave out the USB holder (and 2 resistors aren't essential)
After that slice the two lines to pin 2 (voltage selector pin)
Rewire the 2 lines in order that they 'jumper' over pin 2. Then link pin 2 to battery pack +
Connect up two battery packs and assess the output, is 3.3V!
This LED is around $3 from mouser component #889-W32182 its a 'star' 1W cool white LED. Cool white LEDs are more efficient than hot white ones and also make certain it comes inside bundle with all the heatsinking aluminum substrate!
Turn on your power supply, dial it to 3.3V
Touch positive and negative into the LED
You can tweak the energy voltage directly into look at differences when considering 3.3V and 3.5V in
Attracting around 0.2 Amps, this can be a .66W drive. Which will be sufficient in my situation, once again a better motorist could be utilized then again your electric batteries would strain faster too.
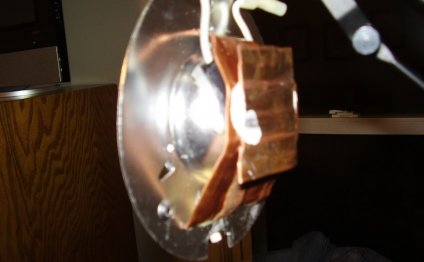
After that up, we make use of JB Weld to add the LED on the lightbulb mount, this keeps the Light-emitting Diode from getting around as well as offers it a great big heat sink! The LED gets exceedingly cozy usually and may be damaged.
Solder two cables, red and black colored, as shown, ensure they flex all over little tabs and that the red wire does not short up against the metal backing. Test the LED once its been soldered up.
Mix-up your JB Weld as instructed, 1/2 each part and stir with a stick.
Dab it onto the owner and slip the LED assembly on.
Let it stay for 6 hours, at least. Overnight is most beneficial.
Since the Light-emitting Diode is dried out, its time to begin setting up it. Thread the LED through the reflector and solder it to your mintyboost
Next, find a toggle switch. Any 'mini toggle' does. This one is perfect!
Take away the old switch and put in the newest one. It's going to enter easily.
Cut the good battery pack cable and strip/tin the ends
Solder the wires into the switch, usage heatshrink if you it.
Finish the switch with the addition of all the other hardware and affixing the fan
RELATED VIDEO

Share this Post
Related posts
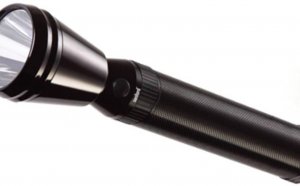
LED Torch Light price
This is certainly Doug’s best yet, a distinctive Compact LED light that does it all. It may be an Outdoor light, Tungsten…
Read More
LED Torchiere Lamp
A Torchiere Lamp is an innovative new and enhanced type of Floor Lamp. Like most Lamp light fixture, it is set up by a plug…
Read Morelatest posts
-
 LED Projector Lamp price January 16, 2024
 -
 LED light bulbs for sale cheap January 11, 2024
 -
 Light Bulb Shapes January 6, 2024
 -
 LED curing light for Gel nails January 1, 2024
 -
 LED Spot light bulbs December 27, 2023
 -
 Info on LED lights December 22, 2023
 -
 LED light Nail Dryer December 17, 2023
 -
 LED light for Gel polish December 12, 2023
 -
 LED Decorative Lamps December 7, 2023