Replace Projector Lamp with LED
I did some research online to get a hold of any documents from the projector. All I happened to be able to find was the consumer handbook. Reading it I found the area that resolved the signs: energy, Bulb, Temperature. You can find three feasible says for each signal: Solid Green, which indicates regular procedure; Blinking Green, which shows Starting up; and sound Red, which suggests problematic.
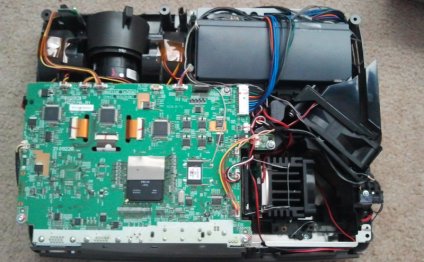
I removed the most notable situation and accessed the key logic board. My intention would be to discover logic signal that has been telling the the board there was an issue because of the light bulb.
We used my multimeter because of the ground linked to a grounding point-on the projector and began calculating values of all the cables visiting the main reasoning board.
I was lucky to locate that each and every pair of wires ended up being labeled, nonetheless it was only abbreviations. When I recorded all the cables in each condition, I made some assumptions as to what each set of cables visited.
RC - Remote control (Since i didn't have a remote the projector and didn't want to buy one I eliminated this wire and sensor)
BL - High voltage and lamp check circuit ( this is actually the wire set that At long last figured out ended up being the only we needed to concentrate on )
LF - Bottom fan cover sensor ( The two wires with this connector must be cut and tied together if you wish to be able to operate the projector with out the fan address )
FF - Fan
LL - Lamp address sensor ( both cables on this connector should be cut and tied together if you'd like to manage to run the projector with out the lamp cover )
Q - Temperature sensor
FN - Fan
There clearly was also a couple of colored wires in a single connector that In addition recorded, but these wound up not needed to alter the projector.
RELATED VIDEO


Share this Post
Related posts

Replacing downlights with LED lights
Targeted at European market of 150 million put in CFLni lights Initially click-to-fit appropriate replacement without want…
Read More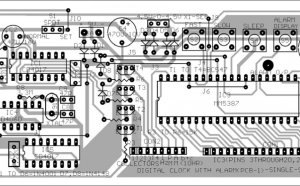
Digital Clock With LED display
Fundamental electronic noisy alarms without a radio. The level inside top-left regarding the screen indicates that time is…
Read Morelatest posts
-
 LED Projector Lamp price January 16, 2024
 -
 LED light bulbs for sale cheap January 11, 2024
 -
 Light Bulb Shapes January 6, 2024
 -
 LED curing light for Gel nails January 1, 2024
 -
 LED Spot light bulbs December 27, 2023
 -
 Info on LED lights December 22, 2023
 -
 LED light Nail Dryer December 17, 2023
 -
 LED light for Gel polish December 12, 2023
 -
 LED Decorative Lamps December 7, 2023