Replace downlights
 Light light bulbs arrive a multitude of sizes and shapes.
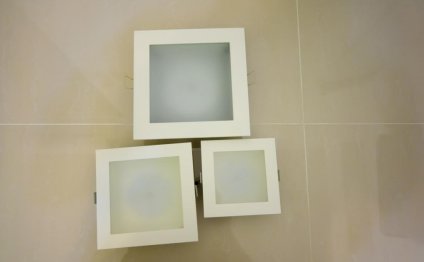
Recessed lighting effects, also known as downlighting, can be found in many aspects of a house. You can find multitudes of trims that replace the method the light produced by the downlight can be used. Start and baffle trims are used for task lighting and area lighting. Eyeball trims enable you to direct the light toward a well liked picture hanging from the wall surface. Wet area trims allow you to put in lights right above your shower, and some trims may also wash your walls in smooth lighting. Sadly, along with these various trims, installing replacement light bulbs may become somewhat difficult.
Bulbs in Baffle, Eyeball and Open Trims
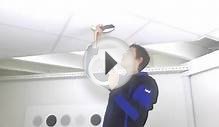
Switch off the light switch to your baffle, eyeball or available trim downlight. Position a ladder under the light bulb you need to change. Let the bulb cool for 20 to half an hour if it absolutely was nonetheless functional.
Adjust an eyeball trim until the light bulb points along toward the ground before the removal of the light bulb. Twist the light bulb counterclockwise with your disposal if you cannot understand the bulb’s human body. If you can’t get the light bulb to turn together with your disposal, utilize duct tape.
Reduce a 6- to 8-inch period of duct tape and stick both ends for the tape into face of light bulb where tape hangs from light bulb face in a U-shape. Grab the exterior of this duct tape and squeeze the tape collectively to produce a handle. Make use of the tape “handle” to show the bulb counterclockwise.
Eliminate the bulb and go on it to you to a house enhancement center to get an upgraded. Getting the old light bulb to you when selecting the replacement guarantees you will purchase the correct light bulb for the downlight.
Insert this new downlight into the socket and change it clockwise. Turn on your light switch.
Bulbs in Wet Place Trims
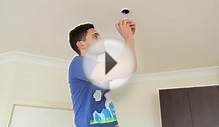
Turn the light pull the plug on towards damp area trim downlight. Position a stepladder underneath the light bulb you will need to change. Allow the light bulb behind the trim cool for 20 to thirty minutes if necessary.
Grab the surface side of the damp location trim with your disposal. Pull the trim away from the roof through to the trim stops. Squeeze the two torsion springs using your hands to discharge the trim through the bracket inside the downlight housing.
Grab the light bulb along with your hand and transform it counterclockwise to eliminate it from downlight housing socket. Make the bulb to you once you visit a property improvement center to purchase the most suitable replacement. Don't imagine at your bulb, especially when replacing a bulb in a wet area trim. The incorrect bulb might lead to the housing to overheat and result in the bulb to pattern don and doff behind the trim.
Insert the replacement bulb into the housing plug. Switch the light bulb clockwise until it prevents.
Squeeze both torsion springs from the wet location trim together with your hands. Insert the springs back to the brackets in the downlight housing. Push the trim up against the roof along with your hand and turn on the light switch.
Low-Voltage Downlight Bulbs
Switch off the light change to your low-voltage downlights. Position a ladder under the downlight you need to replace. Allow low-voltage bulb cool for 20 to half an hour if required.
Grab the surface side of the low-voltage trim with your disposal. Pull the trim from the ceiling until it stops. Squeeze the two torsion springs using your fingers on each side of the low-voltage trim to discharge it additionally the light bulb from bracket inside downlight housing.
Pull the low-voltage lamp through the low-voltage socket. The low-voltage bulb links into the socket with two pins. Slip the low-voltage light bulb from under the spring video holding it into the trim.
Use the low-voltage light bulb to you to a house improvement shop to acquire an upgraded. Make certain you purchase a bulb that is the precise wattage and dimensions. Additionally, compare the pins in the back of original light bulb into replacement light bulb. Make sure the pins are a similar width apart. Look at the wattage of the bulb to make sure it really is 12 volts and not 120 volts, as these light bulbs tend to be very nearly identical. Usually do not try to fold the pins regarding the replacement light bulb to make it match your socket.
Insert the replacement bulb under the spring clamp to carry it into the trim. Line up the light bulb pins with the two holes on socket. Drive the socket from the bulb.
Squeeze the two torsion springs regarding the trim using your fingers. Insert the springs to the brackets in the downlight housing. Drive the low-voltage trim resistant to the roof along with your hand and switch on the light switch.
RELATED VIDEO

Share this Post
Related posts
LED Architect Desk Lamp
Rated 5 out of 5�by Johnboy she actually is a success! Making use of as a piano lampnice varynice flexibilitysuper bright…
Read More
Z-Bar LED Desk Lamp
Energy Saving Ships to Canada The Z-Bar Gen 3 LED table Lamp from Koncept Lighting features the award-winning three-bar design…
Read Morelatest posts
-
 LED Projector Lamp price January 16, 2024
 -
 LED light bulbs for sale cheap January 11, 2024
 -
 Light Bulb Shapes January 6, 2024
 -
 LED curing light for Gel nails January 1, 2024
 -
 LED Spot light bulbs December 27, 2023
 -
 Info on LED lights December 22, 2023
 -
 LED light Nail Dryer December 17, 2023
 -
 LED light for Gel polish December 12, 2023
 -
 LED Decorative Lamps December 7, 2023